8. (For administrators) Manage users and edges - Admin Console#
Admin Console v1.3.0
8.1. Display a list of users (for administrators)#
Open the Admin Console (<base_URL>/admin/).
Note
Admin Console does not appear in the application list, so use the URL to access it.
The list of users is displayed.
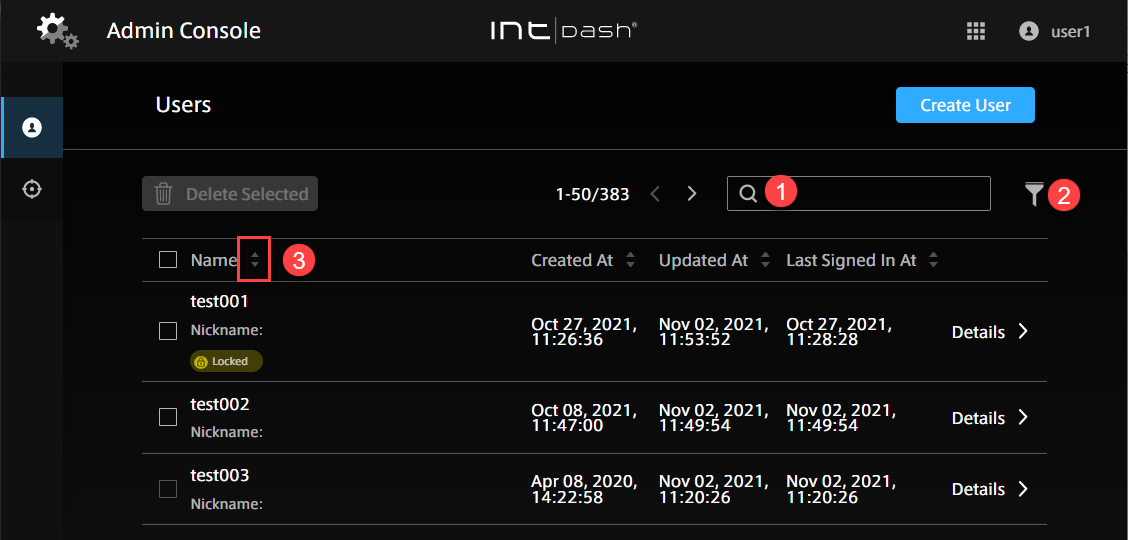
Fig. 31 List of users#
 Search by name (partial match)
 Filter by activation status, lock status, password status
 Sort by a field
Hint
When you change the sort order, perform a string search, or specify a filter, the URL of the current list is displayed in the address bar. By bookmarking this URL, you can later view the list with the same criteria.
8.2. Create a user account (for administrators)#
Administrators can create user accounts in the Admin Console.
Open the user list (
<base_URL>/admin/users) in the Admin Console.Click [Create User].
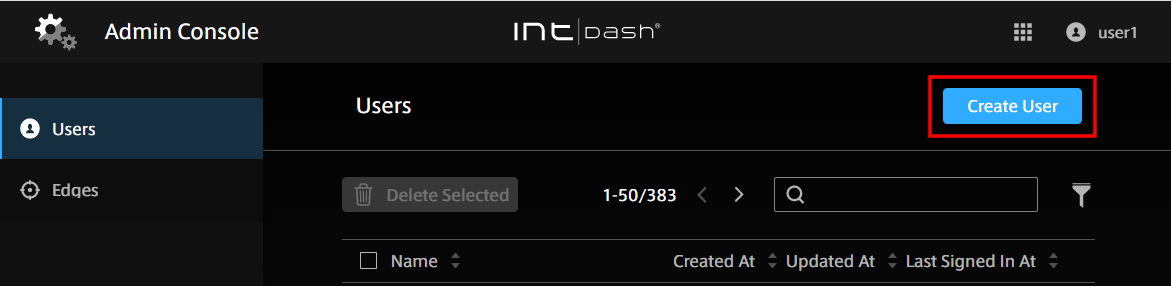
Fig. 32 Create a user#
Set the name and roles.
The name can contain alphanumeric characters (0-9, A-Z, a-z), hyphens (-), and underscores (_).
You cannot use a user name that is already in use in the intdash domain.
Select a role, such as administrator or member. The available roles vary depending on the intdash domain.
Multiple roles can be set for a single user account.
Roles set when the user account is created cannot be changed in the Admin Console.
Other settings are optional.
Click [Create].
When the temporary password is displayed, click [Copy] to copy it to the clipboard.
Attention
The temporary password has an expiration date. Please keep in mind the expiration date indicated.
Inform the user of the sign-in URL, username, and temporary password in a secure manner. The user will be prompted to set a new password the first time they sign in.
8.3. Check/change user information (for administrators)#
Note
See Configure your user account - My Page for how general users can see their information.
Click [Details] of the user you want to see. The following information is displayed.
- Password
The password status for this user account is displayed. There are 2 types of status as below.
Status
Description
Temporary
The administrator has created a temporary password. Waiting for the user to set a new password on My Page.
Not Temporary
A password has been set by the user.
If you want to reissue a password, see Reissue a password (for administrators).
- UUID
A user-specific ID automatically assigned by intdash. The UUID cannot be changed.
- Name
The name of the user. You cannot use a user name that is already in use in the intdash domain.
- Nickname (optional)
You can give the user a descriptive nickname.
- Description (optional)
You can enter a description of the user.
- Enabled
You can enable or disable this user. If disabled, this user will not be able to sign in.
Even if a user account is disabled, the edge accounts owned by that user can still be used. To disable an edge account, delete that edge account.
- Created At
The date and time when this user was created.
- Updated At
The date and time when this user was updated.
- Emails
The email addresses registered for this user account and the registration statuses. There are three types of status as follows.
Status
Description
Unregistered
The email address is not registered. Users can sign in using the user name and password even if their email address is not registered.
Not Verified
The email address is registered but not verified. To verify the email address, the user needs to send a confirmation email to themselves by clicking a button on My Page.
Verified
The e-mail address has been registered and verified.
- Roles
Set roles such as administrator (admin) and general user (member). The available roles vary depending on the domain.
Attention
Roles set when the user account is created cannot be changed in the Admin Console.
- API tokens
Displays API tokens issued for this user account. See Create API tokens for a user (for administrators) for issuing API tokens.
If you want to change the settings, edit them and click [Save changes].
8.4. Delete a user account (for administrators)#
Open the user list (
<base_URL>/admin/users) in the Admin Console.Click [Details] for the user.
Click [Delete].
When a user account is deleted, the edge account owned by that user will have no owner. The administrator can set a new owner in the edge account details screen. See Check/change edge information (for administrators) for more information.
Hint
If you want to delete multiple user accounts at once, select the check box of the target users and click [Delete Selected] at the top of the screen.
8.5. Reissue a password (for administrators)#
Open the user list (
<base_URL>/admin/users) in the Admin Console.Click [Details] for the user account for which you want to issue a password.
Click [Reset Password].
Click [Reset] to reset the password.
The current password will be invalidated and a temporary password will be created. You can copy it to the clipboard by clicking [Copy].
Notify the user of the temporary password in a secure manner.
When the user signs in, they will be prompted to set a new password for themselves.
Attention
The temporary password has an expiration date. Please keep in mind the expiration date indicated.
8.6. Unlock the password (for administrators)#
If you try to sign in to intdash and enter a wrong password more than a certain number of times, the password will be locked. The administrator can unlock the password.
Open the user list (
<base_URL>/admin/users/) in the Admin Console.Click [Details] for the user account you want to unlock the password for.
Click [Unlock].
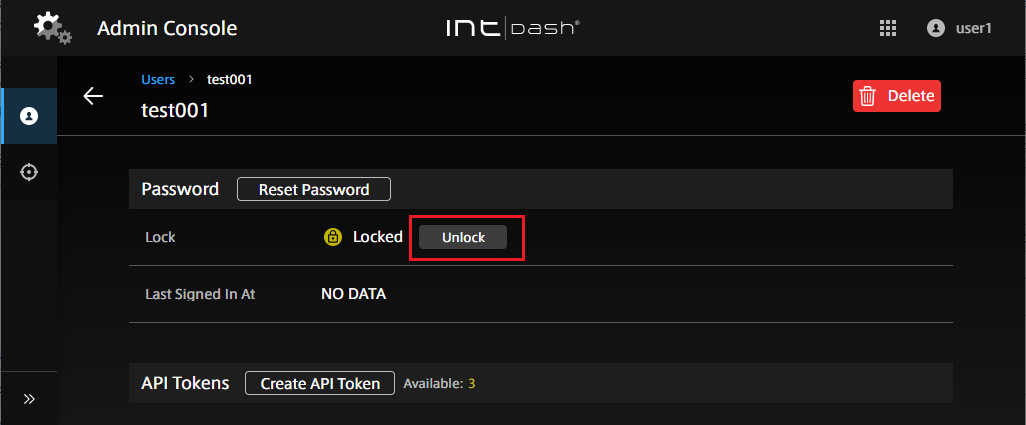
Fig. 33 Unlock a password#
8.7. Create API tokens for a user (for administrators)#
Note
See Create an API token for information on how a general user can create their own API token.
If you want to access the intdash API as a user using a program with the intdash SDK, you will need an API token. Administrators can create API tokens.
Open the user list (
<base_URL>/admin/users/) in the Admin Console.Click [Details] for the user account for which you want to create tokens.
Click [Create API Token].
Enter a name to distinguish the API tokens (setting the expiration date is optional).
Click [Create].
Click [Copy] to copy the API token and notify the user in a secure way.
Note
The API token is displayed only once at the time of creation.
The user account details screen will show the statuses of the API tokens that have been created.
There is a limit to the number of tokens per user. If "Available" is 0, tokens cannot be created.
Users can create their API tokens in My Page.
8.8. Display the list of edges (for administrators)#
Note
For information for general users, please see below.
When you open the Admin Console, you will see a list of edges.
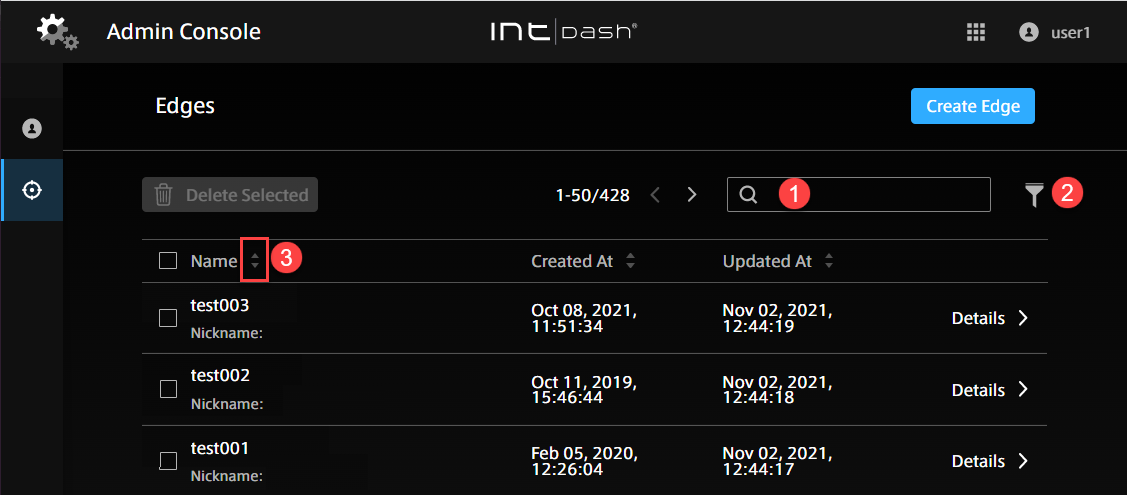
Fig. 34 List of edges#
Search by name (partial match)
Filter (filtering is not possible in the current version)
Sort by a field
Hint
When you change the sort order or perform a string search, the URL of the current list will be displayed in the address bar. By bookmarking this URL, you can later view the list with the same criteria.
8.9. Create an edge account (for administrators)#
Note
See Create edge accounts for how a general user can create their own edge account.
Administrators can create edge accounts in the Admin Console. When you create an edge account, you will be issued a UUID for that edge and a client secret for authentication.
Open the edge list (
<base_URL>/admin/edges) in the Admin Console.Click [Create Edge].
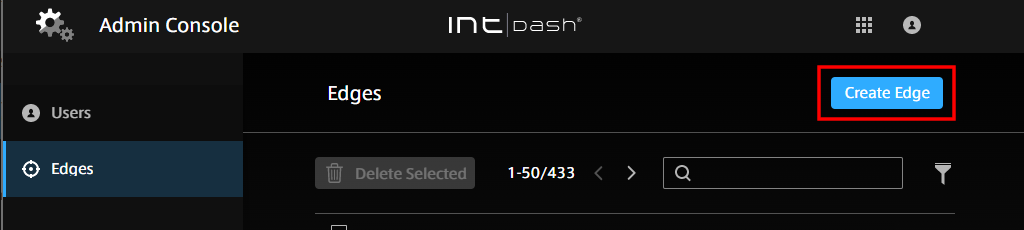
Fig. 35 Create an edge#
Set a name.
The name can contain alphanumeric characters (0-9, A-Z, a-z), hyphens (-), and underscores (_).
You cannot use an edge name that is already in use in the intdash domain.
Other settings are optional.
Click [Create].
The UUID of the edge and the client secret will be displayed. Copy them.
Attention
The client secret is displayed only once.
Note
When you create an edge account in the Admin Console, the edge account has no owner. The owner can be set later. The name and display name can also be changed later. See Check/change edge information (for administrators) for more information.
8.10. Check/change edge information (for administrators)#
Note
See Change edge account settings / Delete edge account for information on how general users can see information about their edges.
Click [Details] for the edge you want to see. The following information is displayed.
- UUID
An edge-specific ID automatically assigned by intdash. The UUID cannot be changed.
- Name
The name of the edge. You cannot use an edge name that is already in use in the intdash domain.
- Nickname (optional)
You can give the edge a descriptive nickname.
- Description (optional)
You can enter a description for the edge.
- Created At
The date and time when this edge was created.
- Updated At
The date and time when this edge was updated.
- Owned By
The owner of this edge. The owner can change the name and nickname of the edge in My Page.
If you want to change the settings, edit them and click [Save changes].
Note
If you click [x] to delete the owner and save the changes, the edge will have no owner.
8.11. Delete an edge account (for administrators)#
Note
See Change edge account settings / Delete edge account for how general users can delete their edges.
Open the edge list (
<base_URL>/admin/edges) in the Admin Console.Click [Details] for the edge.
Click [Delete].
Hint
If you want to delete multiple edge accounts at once, select the check box of the edge accounts and click [Delete Selected] at the top of the screen.