11. Other settings and operations#
Terminal System v1.23.0
11.1. Set the display language and time zone for the settings screen ([Preferences]).#
You can change the language of the Terminal System settings screen and the time zone used for the display.
Open the [Preferences] menu.
Select your language and time zone.
Attention
This setting is saved in the web browser of the configuration PC. Therefore, if you use another web browser, you need to set it again.
11.2. Confirm/change the name of the Terminal System ([System]).#
You can confirm/change the name of the Terminal System. This name is used when accessing the Terminal System from the configuration PC.
Open the [System] menu.
The name of the computer in this Terminal System will be displayed in the [Device Name] field.
If you want to change it, enter a new name and click [Save Changes].
Use http://<Terminal System computer name>.local/config/ to access the Terminal System settings screen from the configuration PC.
11.3. Update Terminal System software ([System])#
You can update the Terminal System software using one of the following methods.
- Online automatic update
Terminal System automatically downloads software update files from a dedicated repository via the Internet. By setting in advance, the update can be executed at the specified timing. (Get update files automatically via the internet)
- Update using a file
The user uploads a software update file to the Terminal System from the configuration PC. The Terminal System does not need to be connected to the internet. (Update using a file)
Attention
Please note the following points when updating the software.
When the software update is started, the measurement will stop.
Do not turn off the Terminal System while updating software.
When updating the software of peripheral devices using this function, connect the required peripheral devices in advance.
Do not remove peripherals while updating software.
11.3.1. Get update files automatically via the internet#
You can use the online automatic update function to obtain the update file via the Internet.
Note
[Update Sources] must be set for online automatic update. Usually this is already set up, but if you are unsure which repository to specify, please contact us.
To make a new setting, enter the ID (any descriptive name, alphanumericals only) and URL, and click [Add].
When [Update Sources] is set, Terminal System accesses the repository via the Internet about 5 minutes after the power is turned on and downloads new update files, if any.
When a new update file is downloaded, you will see the message "A software update is available." in the [System]> [System Information] > [Version].
You can apply the update immediately by clicking [Update Now].
To apply the update at a fixed timing, set as follows.
Open the [System] menu.
In [Online Automatic Update] > [Update Settings], set when to apply the updates.
If you turn on [Update Regularly], the Terminal System will be updated if it is turned on at the specified time.
Attention
If the measurement is being performed at the time specified in [Update Regularly], the measurement will be stopped and the update will be performed. When the update is complete, the measurement will resume automatically.
Depending on the content of the update, the message "Reboot the Terminal System." will be displayed. In that case, operate the power switch to restart the Terminal System.
11.3.2. Update using a file#
Receive an update file from aptpod and copy it to the configuration PC.
Access the Terminal System setting screen from the configuration PC.
Under [System]> [Update Using File], click [Browse] and specify the update file.
The update file will be uploaded to the Terminal System and the update will begin.
Depending on the content of the update, the message "Reboot the Terminal System." will be displayed. In that case, operate the power switch to restart the Terminal System.
11.4. Check system information such as CPU usage and storage usage ([Hardware]).#
Open the [Hardware] menu.
[Status] shows information such as CPU usage and storage usage.
The serial number may be required when you contact us.
11.5. Change the password to access the settings screen ([Basic Auth]).#
You can change the password used to access the setting screen.
Open the [Basic Auth] menu.
Enter your new password and click [Save changes].
Note
What you can change here is the password for accessing the setting screen from the configuration PC. It is not the password to sign in to the intdash server.
11.6. Configure settings for saving RAW data ([intdash]>[RAW Data]).#
The data acquired from devices before applying filters is saved in the Terminal System as backup data (RAW data). The location where the RAW data is saved can be changed.
Attention
RAW data is data that the Terminal System has internally for backup, and is not used in normal use cases.
RAW data is different from "unsent data". For more information about unsent data, see Send only unsent data (resend mode).
RAW data is saved in a dedicated format.
RAW data cannot be downloaded from the Terminal System settings screen.
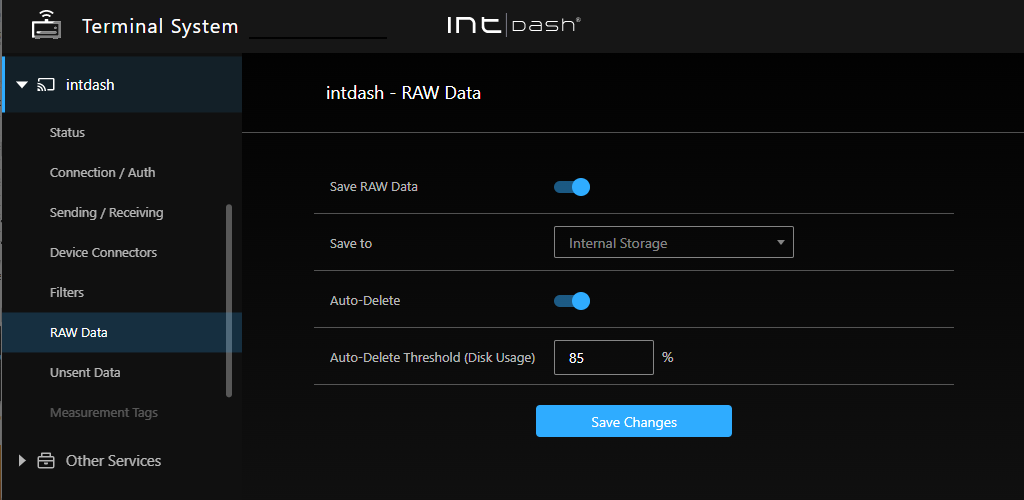
Fig. 74 [intdash] menu > [RAW Data]#
11.6.1. Change the settings for RAW data#
Settings for RAW data can be made in the [intdash] menu > [RAW Data].
- Save RAW Data
When turned on, RAW data will be saved in the Terminal System.
- Save to
Select a destination to save the RAW data.
Attention
If you remove the USB or SD card that has been selected as the destination for RAW data, the RAW data will not be saved.
- Internal Storage
Save RAW data to the internal storage of the Terminal System.
- USB
Save RAW data to USB storage. In order to save RAW data to USB storage, the following must be met
Only one USB storage device must be connected to the Terminal System.
USB storage must be formatted as FAT or FAT32.
The first partition of the USB storage will be used to store the RAW data.
- SD Card
Save RAW data to SD card. In order to save RAW data to SD card, the following must be met.
The Terminal System computer must have an SD card slot.
Only one SD card must be connected to the Terminal System.
The SD card must be formatted in FAT or FAT32.
The first partition of the SD card will be used to store the RAW data.
- Auto-Delete
Each time you make a measurement, RAW data is accumulated, which reduces the available disk space. By enabling automatic deletion, you can avoid the disk from filling up.
When Auto-Delete is enabled, the oldest RAW data will be automatically deleted when the disk usage exceeds the [Auto-Delete Threshold (Disk Usage)].
- Auto-Delete Threshold (Disk Usage)
If [Auto-Delete] is enabled, RAW data will be automatically deleted when the usage of the RAW data partition exceeds this value.
After configuring the settings, click [Save Changes].
If a message appears at the top of the screen requesting a restart, the settings will take effect after the restart. If you click [Restart] in the [intdash] menu > [Status], the intdash service will be started with the new settings and the measurement will begin.
11.7. Directly edit the configuration file#
You can view and directly edit configuration files stored in the Terminal System.
Warning
If incorrect settings are applied by directly editing the configuration file, the system may not work properly. Use only if you fully understand the impact of the configuration changes.

Fig. 75 Edit the configuration file#
Access
http://<Terminal System name>.local/config/config-files/with a web browser.Note
This function setting cannot be accessed from the menu in the screen; you must enter the URL to access it.
Select the file you want to edit and click [Edit].
Click [Download] to download the configuration file to the PC.
When you are done editing, click Save.
If a message appears at the top of the screen requesting a restart, the settings will take effect after the restart. If you click [Restart] in the [intdash] menu > [Status], the intdash service will be started with the new settings and the measurement will begin.
11.8. Get remote support#
Remote support means that a support staff member can remotely log in to your Terminal System via the Internet to perform maintenance.
During remote support, the support staff accesses your Terminal System using SSH (Secure Shell) via a managed relay server. As long as the security of the relay server is functioning, no third party from outside can log in to your Terminal System.
To use this feature, both the customer and the support staff must be prepared in advance.

Fig. 76 Remote support#
11.8.1. Prepare to get remote support.#
In order to be able to receive remote support, please let your support representative know that you need remote support. You should receive the following from your support representative
SSH login user name (login name of the support staff)
Public key of the SSH login user above
Relay server name (FQDN)
Listening Port on Server
Using this information, configure the Terminal System as follows.
Open [SSH Login Users].
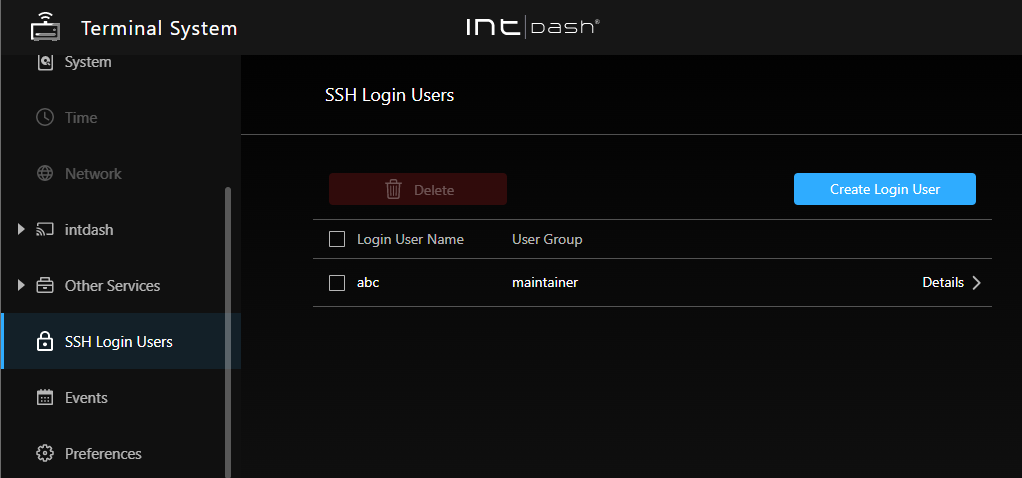
Fig. 77 SSH Login Users#
Click [Create Login User], enter the SSH login user name you received from your support representative, and click [Create].
Enter the public key you received from your support representative, and click [Save Changes].
Go to [Other Services] menu > [Remote Support] and click [Create Settings].
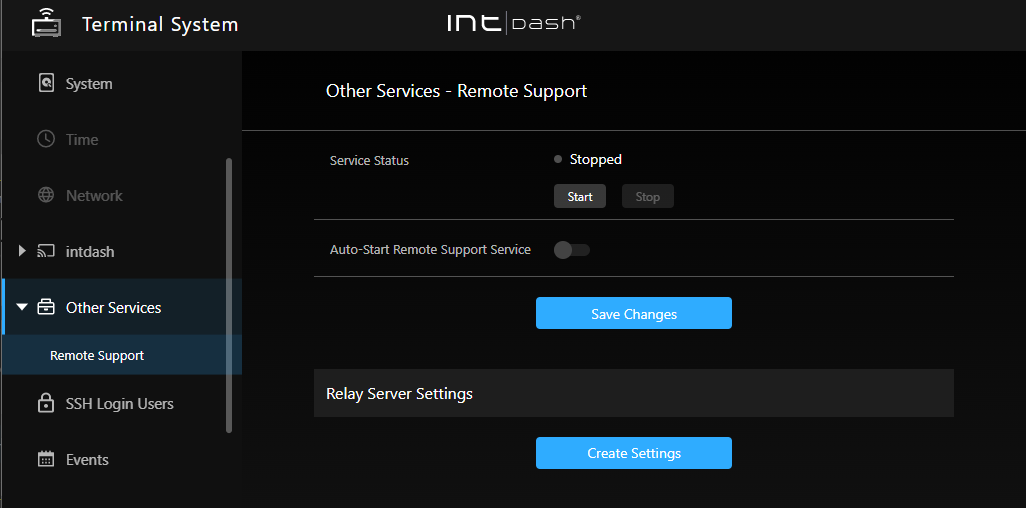
Fig. 78 Remote support#
Note
You can only create one setting. If you already have a setting, you can delete it by clicking [Delete Settings].
Enter the name (FQDN) and the listening port number of the relay server, and click [Create].
When the public key is issued, copy it and send it to the support staff by e-mail or other means.

Fig. 79 Issuing a public key#
The support staff will set this public key on the relay server. This will allow the Terminal System to connect to the relay server.
After configuring the settings, click [Save Changes].
If a message appears at the top of the screen requesting a restart, the settings will take effect after the restart.
11.8.2. Receive remote support#
To get remote support, start the remote support service as follows.
Note
Please arrange the date and time for remote support between you and the support staff in advance. Start the remote support function according to the agreed upon support time.
Make sure that the Terminal System is connected to the Internet.
In the [Other Services] menu > [Remote Support], click [Start] to start the remote support function.
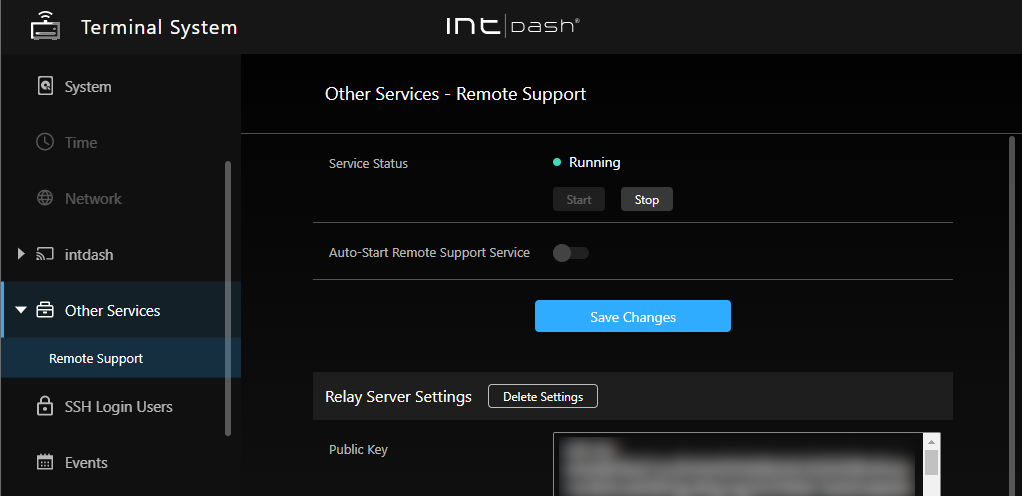
Fig. 80 Activate the remote support function#
Our support staff will remotely log in to your Terminal System via the Internet to perform maintenance.
When the remote support is finished, go to the [Other Services] menu > [Remote Support ]and click [Stop] to stop the remote support function.
Note
When [Auto-Start Remote Support Service] is turned on, the remote support function will be automatically started when the Terminal System starts. Normally, you do not need to turn on this function.