4. Connect to the network#
Terminal System v1.23.0
Proper configuration is required to connect Terminal System to the network.
4.1. Network type and priority#
The Terminal System uses the network for two purposes:
Sending measurement data (Terminal System accesses the intdash server.)
Terminal System settings (The configuration PC accesses the terminal system.)
There are five types of networks available: The possible uses for each type are as follows (The ✓ mark indicates that it is available for use.).
Network type |
Sending measurement data (Terminal System accesses the intdash server) |
Terminal System settings (Configuration PC accesses the terminal system) |
|---|---|---|
Ethernet |
✓ |
✓ |
Wireless LAN - Client Mode |
✓ |
✓ |
Wireless LAN - Access Point Mode |
- |
✓ |
Cellular |
✓ |
- |
Cellular - USB Device |
✓ |
- |
Attention
When using wireless LAN, connect the USB wireless LAN adapter specified by aptpod. Other USB wireless LAN adapters may not work properly.
When using a cellular connection, connect the built-in LTE module or LTE adapter specified by aptpod. Otherwise, it may not work properly.
When using a cellular network, depending on the SIM card, activation procedures may be required after purchase.
Terminal System does not support SIM PIN.
Only one setting of the same type can be enabled (for example, two Ethernet settings cannot be enabled). Also, "Wireless LAN - Client Mode" and "Wireless LAN - Access Point Mode" cannot be enabled at the same time.
4.1.1. Network settings for sending measurement data (Terminal System accesses the intdash server)#
Only one of the enabled settings with the highest priority will be used. The priority of the network type is as follows:
"Ethernet"
"Wireless LAN" (Client Mode or Access Point Mode)
"Cellular" or "Cellular - USB Device"
For example, if the "Ethernet" and "Wireless LAN - Client Mode" settings are enabled, the Ethernet connection will be tried first, and if the connection is not possible, the wireless LAN will be used.
4.1.2. Network settings during Terminal System setup (Configuration PC accesses the terminal system)#
If Ethernet or wireless LAN (client mode or access point mode) is enabled, you can use either one.
For example, if both "Ethernet" and "Wireless LAN - Client Mode" are enabled, you can communicate via Ethernet or wireless LAN from the configuration PC. If you specify the Ethernet IP address of Terminal System on the configuration PC, you can access via Ethernet, and if you specify the IP address for wireless LAN, you can access via wireless LAN.
Attention
If no network settings are available (deleted or disabled), you will not be able to access the Terminal System settings screen. In that case, please contact the support desk.
4.1.3. Details of each network type#
- Ethernet
Connect the Ethernet cable to the Terminal System and connect it to an existing LAN such as a corporate LAN. This type is also used when connecting the Terminal System and the configuration PC on a one-to-one basis using an Ethernet cable.
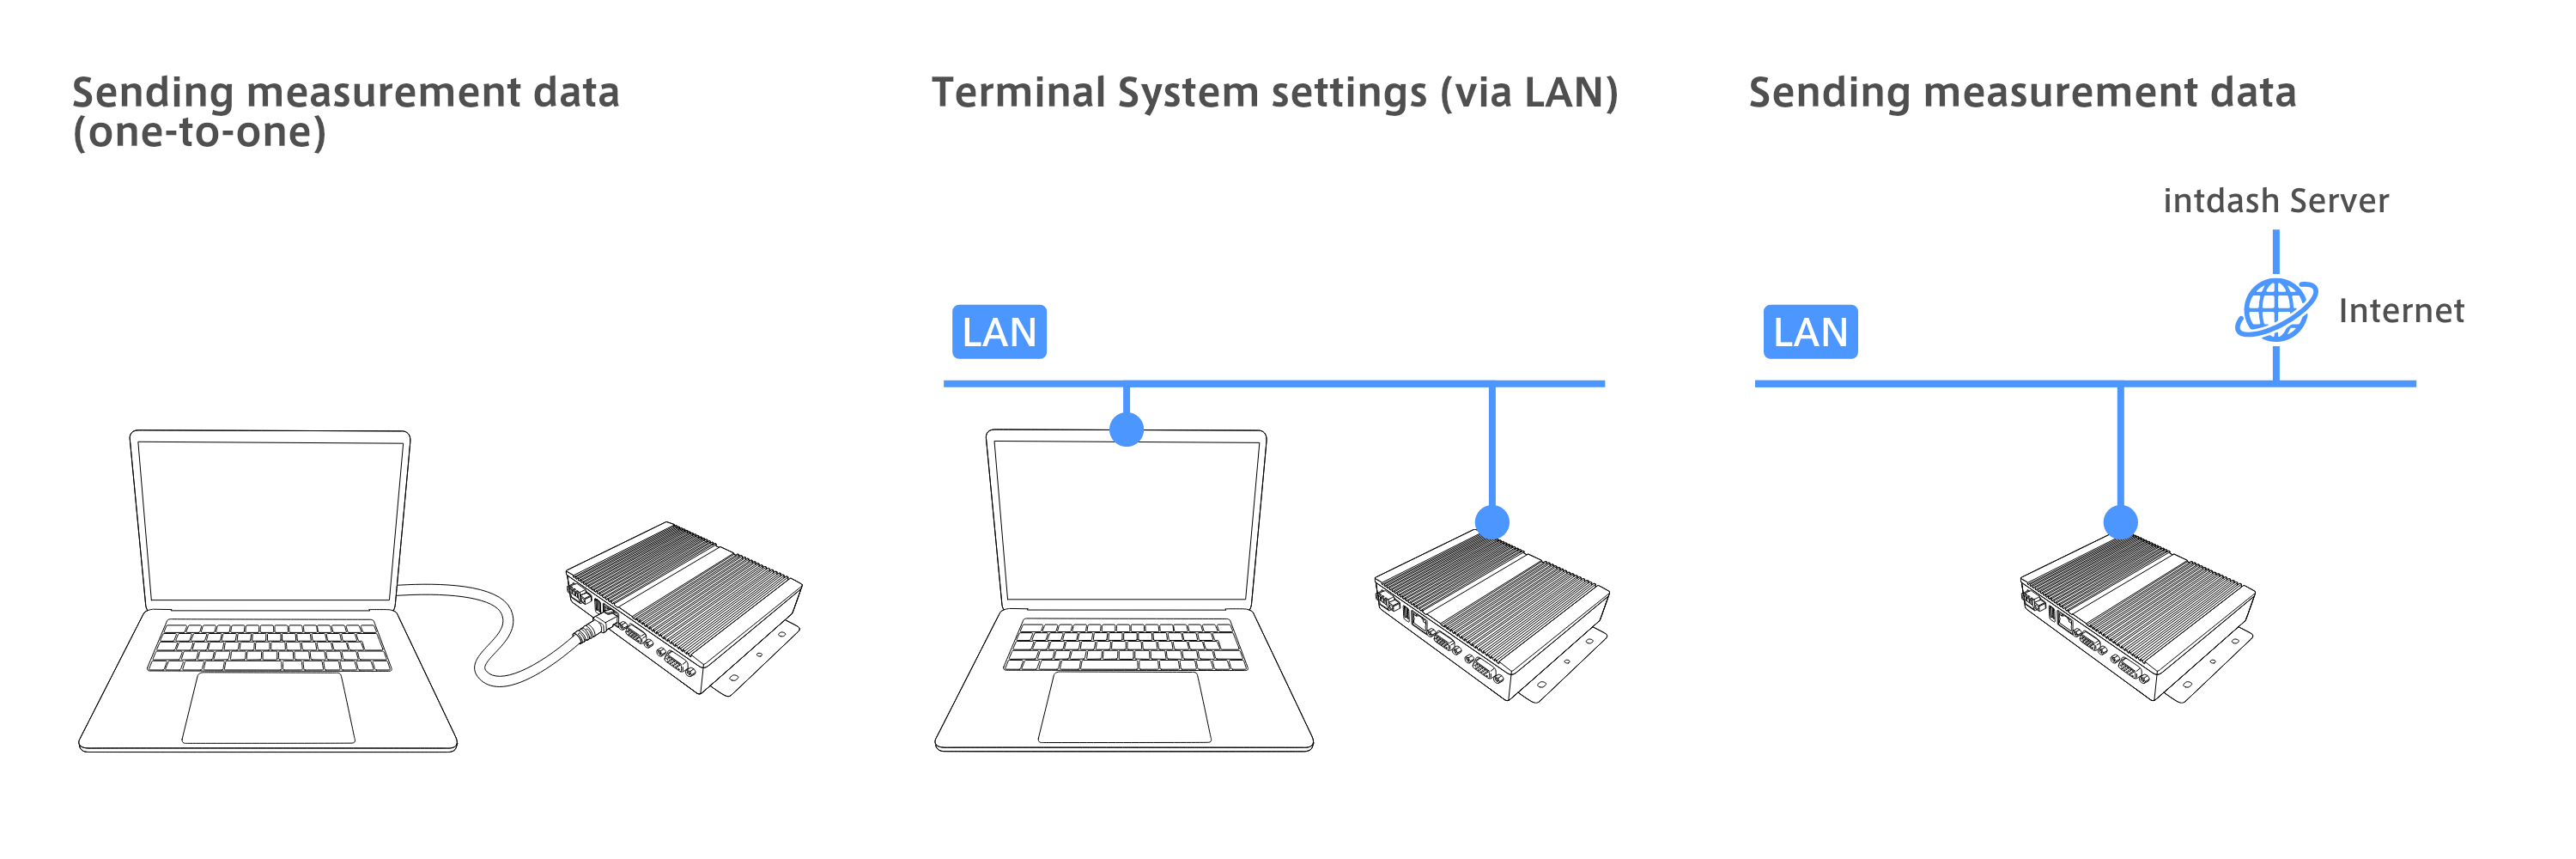
Fig. 61 Ethernet#
The Ethernet cable can be attached and detached while using the Terminal System.
- Wireless LAN - Client Mode
Connect the wireless LAN adapter to Terminal System. Connect to an existing wireless LAN, such as an in-house LAN, as a client.
WPA-PSK and WPA-PSK2 authentication methods are supported.
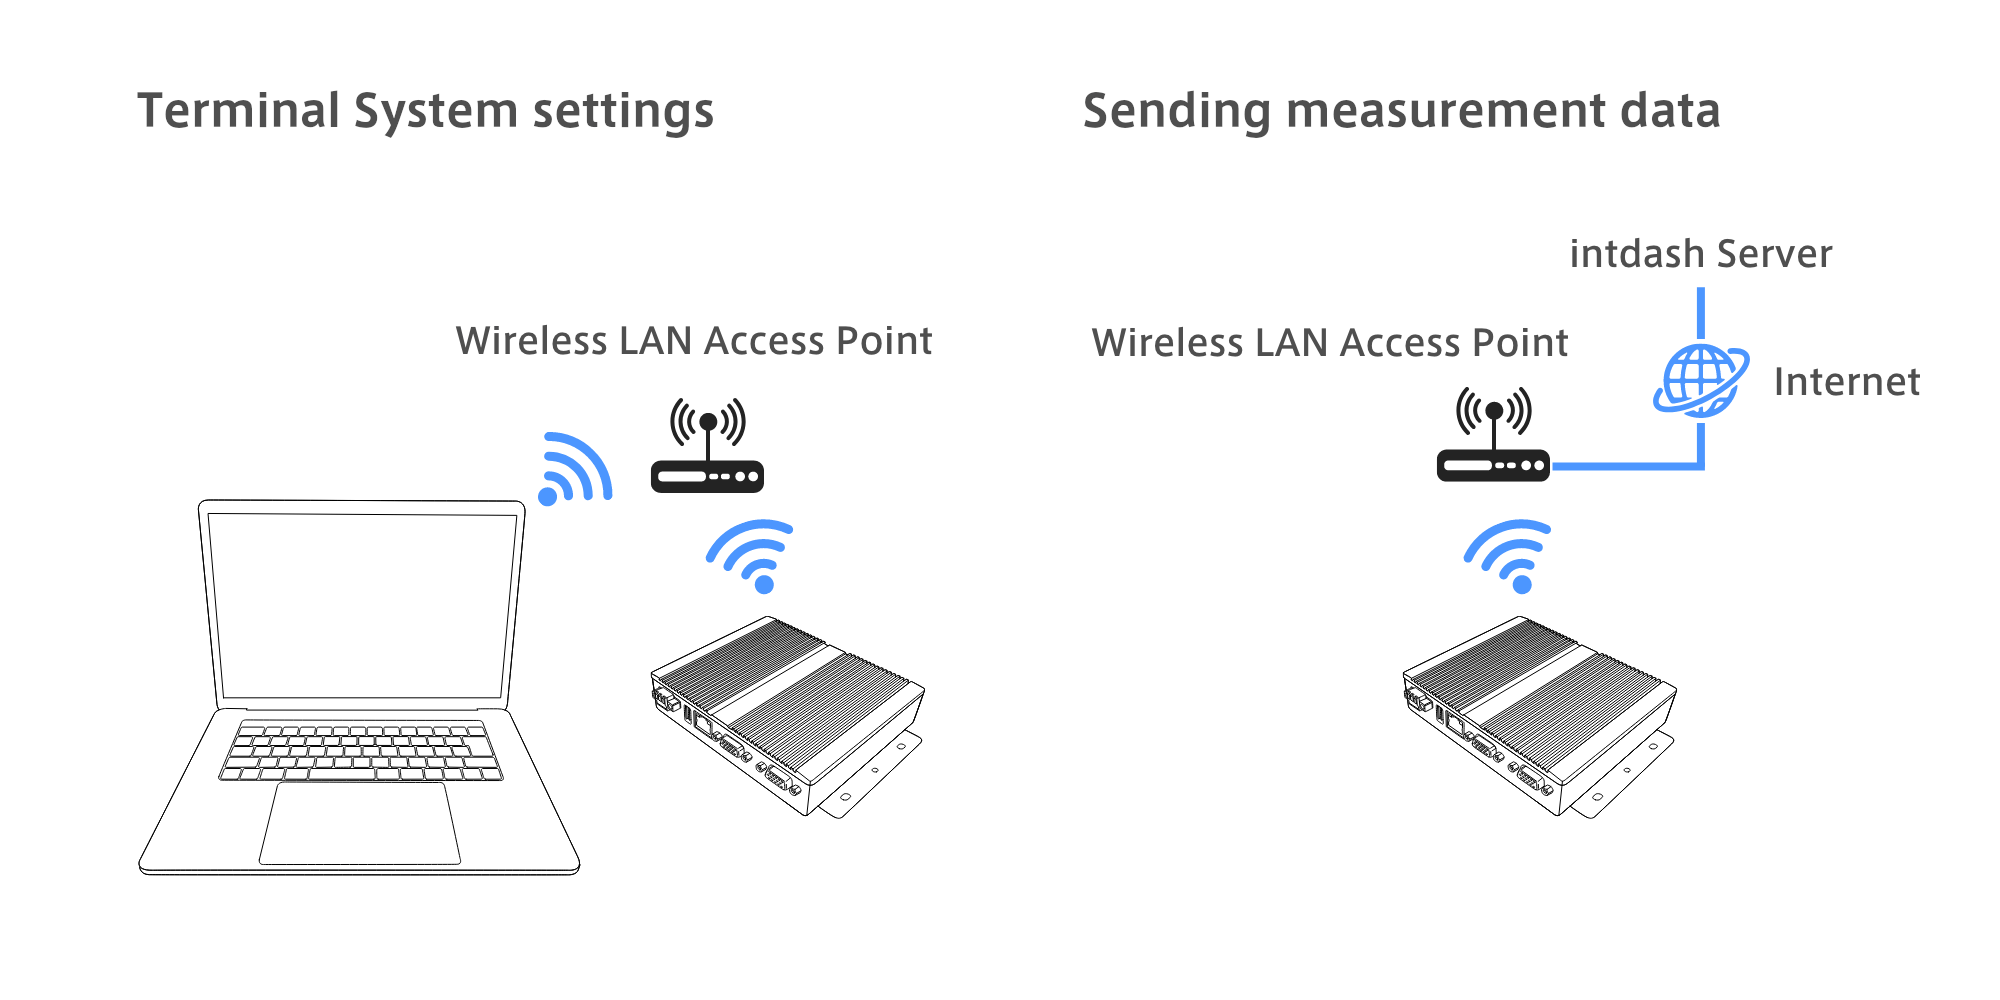
Fig. 62 Wireless LAN - Client Mode#
- Wireless LAN - Access Point Mode
Connect the wireless LAN adapter to the Terminal System to make the Terminal System itself a wireless LAN access point. This allows you to access the Terminal System settings screen from another PC.
It does not have the ability to redirect communications from other PCs to the Internet (no tethering capability).
WPA-PSK and WPA-PSK2 authentication methods are supported.
When using the EDGEPLANT T1 as the Terminal System computer, DHCP functionality is provided to the client. DHCP functionality is not provided when using VTC 1910-S.
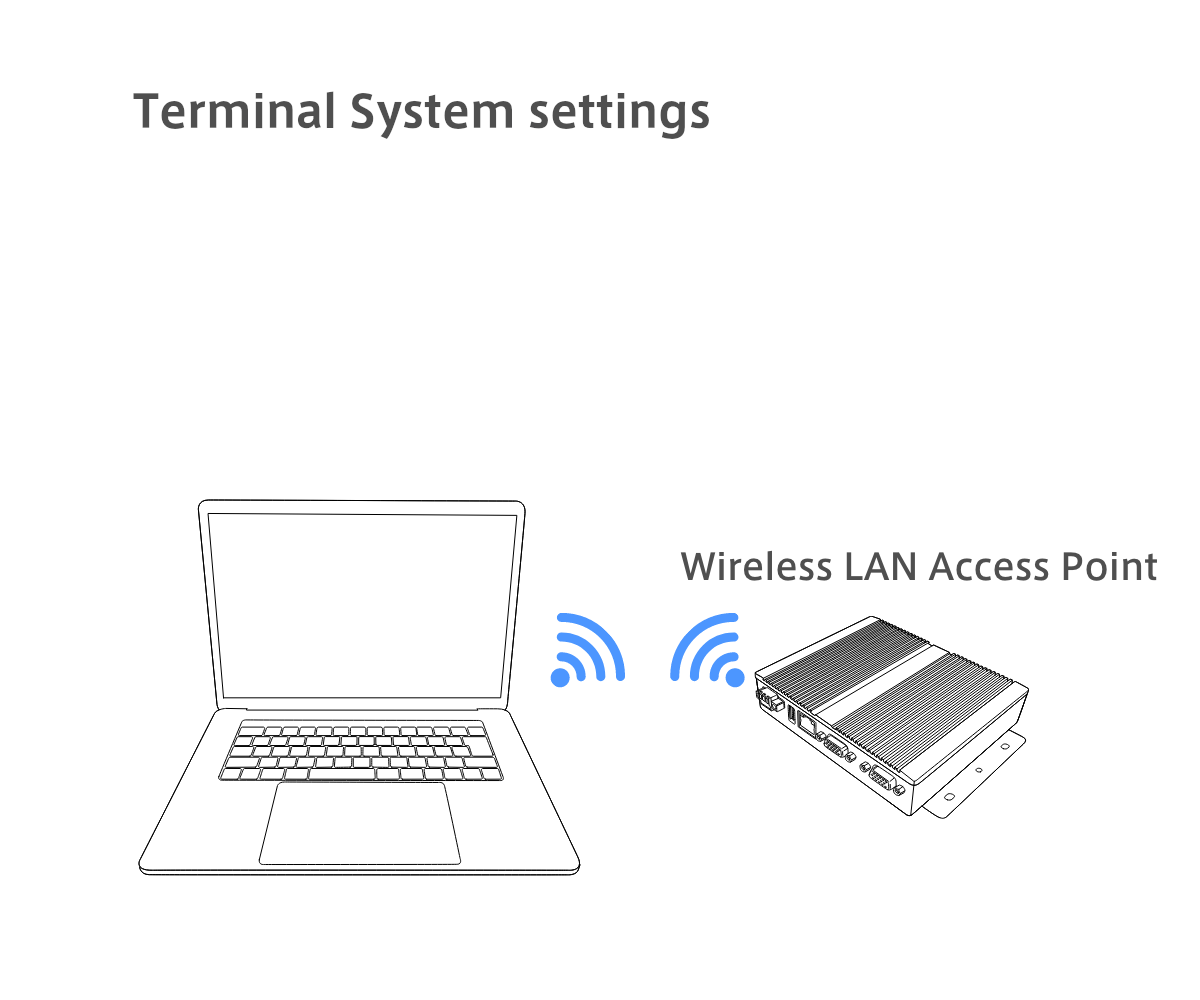
Fig. 63 Wireless LAN - Access Point Mode#
- Cellular
Use the LTE module built into the Terminal System to connect to the cellular network.
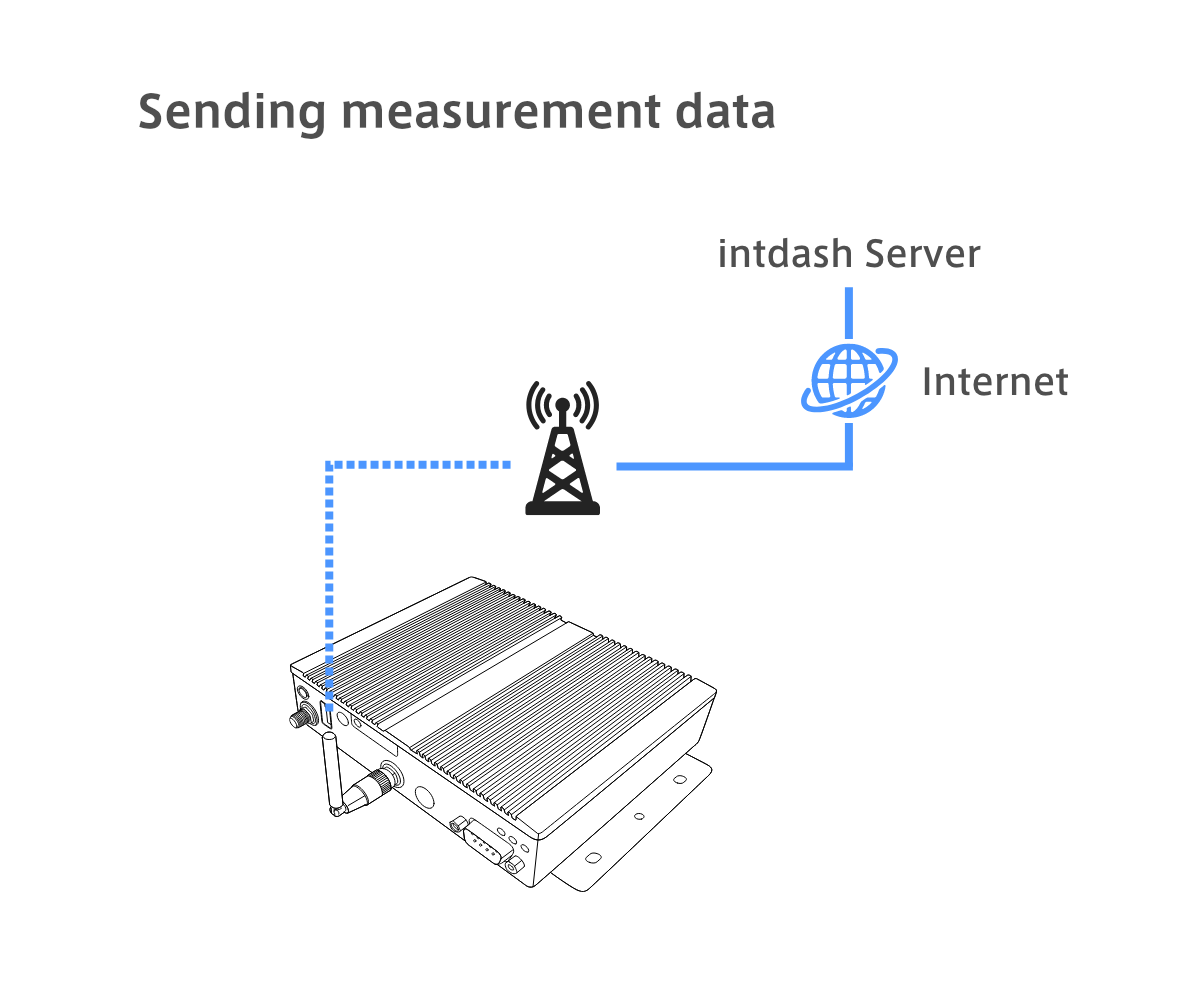
Fig. 64 Cellular#
Attention
Do not insert or remove the SIM card while the Terminal System is turned on. Insert the SIM card before turning on the Terminal System.
Insert the SIM card all the way in.
RSSI (Received Signal Strength Indicator) is displayed on the details screen of the network settings.
- Cellular - USB Device
Use a USB-connected LTE adapter to connect to the cellular network
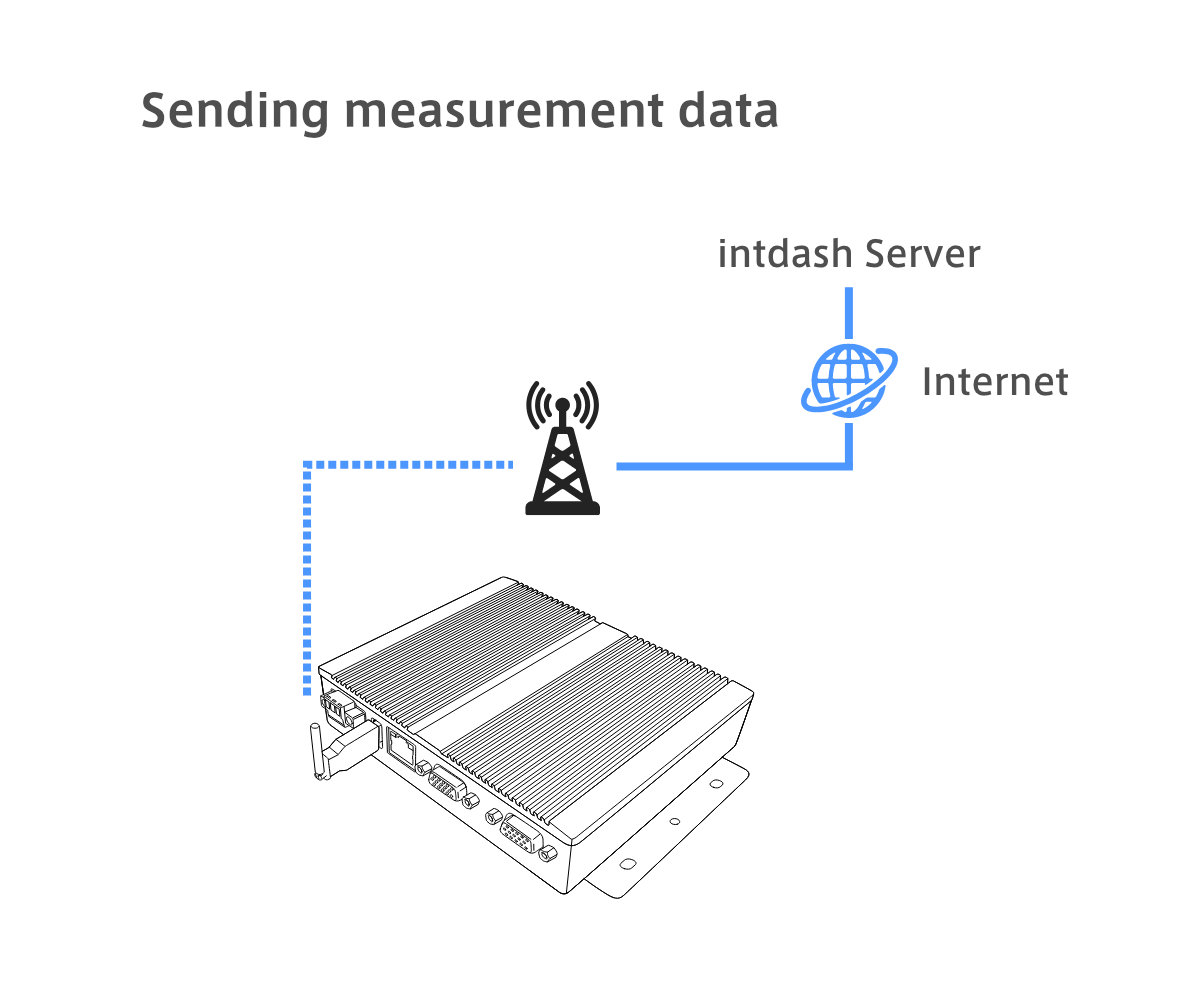
Fig. 65 Cellular - USB Device#
Attention
When using "Cellular - USB Adapter", RSSI (Received Signal Strength Indicator) is not displayed on the detailed screen of network settings.
4.2. Create / change network settings#
To create or change network settings, do the following:
Attention
When making settings for connections that use external devices such as wireless LAN adapters and LTE adapters, make settings with the required devices connected. If you try to set it when it is not connected, the setting will not be reflected normally and an error will occur.
If you want to create a new configuration, click [Create Network Setting]. If you want to change the existing network settings, click [Details].
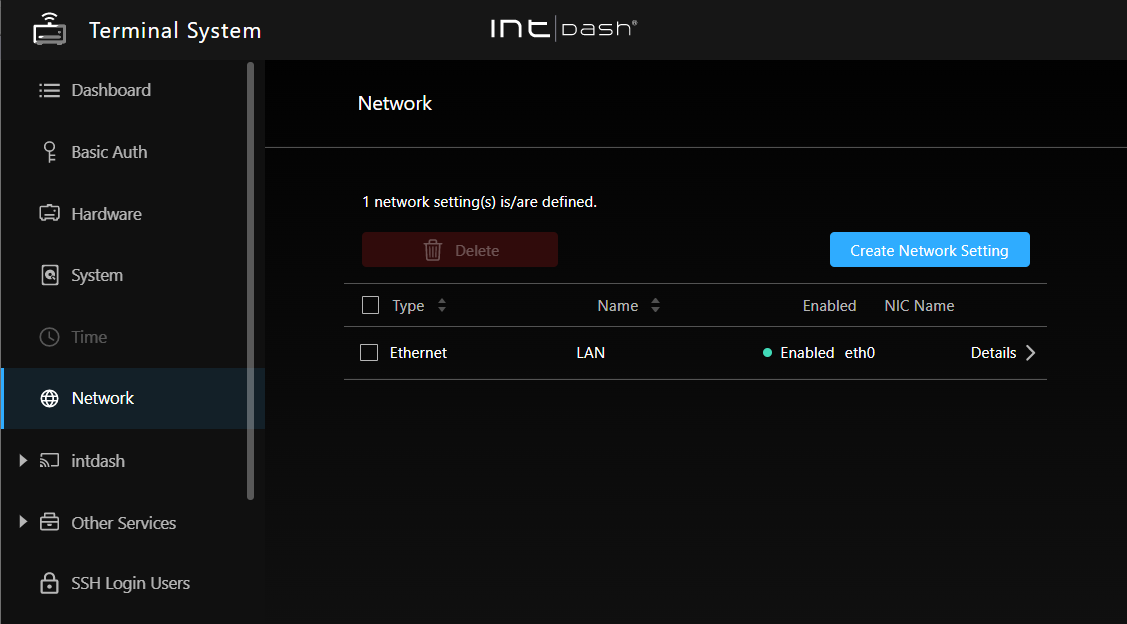
Fig. 66 Network settings#
Enter the settings and click [Save Changes].
See Network setting items for more information on the settings.
Operate the power switch to restart the Terminal System.
Note
While connected to the network, you can check the information such as the IP address by clicking [Details] in the network settings you are using.
4.3. Network setting items#
The setting items are as follows.
4.3.1. Setting items common to all types#
- Name
Enter any descriptive name to distinguish the network settings.
- Enabled
Enables / disables this network setting. Only one setting of the same type can be enabled.
See Network type and priority for network configuration priorities.
Attention
If no network settings are available (deleted or disabled), you will not be able to access the Terminal System settings screen. In that case, please contact the support desk.
- Type
Select the type such as Ethernet or wireless LAN. The setting items are displayed according to the selected type.
- NIC
From the NICs (Network Interface Cards) recognized by the Terminal System, select the one used for this setting.
4.3.2. Setting items for Ethernet#
- DHCP
Set whether to use DHCP. If the network you are connecting to has DHCP, turn this on and the IP address of the Terminal System is automatically assigned.
Attention
Be sure to turn this setting on when sending data to the intdash server. If you turn it off, you will not be able to send data.
If you want to use a fixed IP address when setting the Terminal System, turn this setting off and set the following static IP address.
- Static IP Address, Subnet Mask of Static IP Address, Default Gateway of Static IP Address
If you turned off DHCP, enter the IP address, subnet mask, and default gateway to assign to the Terminal System.
4.3.3. Setting items for Wireless LAN (client mode)#
- SSID
Enter the SSID of the existing wireless LAN to connect to.
- Passphrase
Enter the passphrase of the wireless LAN to connect to.
Attention
If you make a mistake in the SSID or passphrase, you will not be able to connect, but no error message will be displayed. Please enter the correct SSID and passphrase.
4.3.4. Setting items for Wireless LAN (access point mode)#
- SSID
Set the SSID to be provided by the Terminal System access point. Use this SSID when connecting to the Terminal System access point from other PCs.
- Passphrase
Set the passphrase (password) used when connecting to the Terminal System access point from another PC.
- IP Address
Specifies the IP address assigned to the Terminal System itself. If not specified, the default value (192.168.0.100) is used.
- Subnet Mask
Specify the subnet mask of the IP address of the Terminal System itself. If not specified, the default value (255.255.255.0) is used.
4.3.5. Setting items for Cellular#
The APN, authentication method, username and password will vary depending on your cellular network. See the information that came with your SIM card.
- APN
Enter the access point name.
- Authentication Method
Select the access point authentication method. If you don't know the authentication method, try "CHAP" first. If you cannot connect, then try "PAP".
- Username
Enter the access point user name.
- Password
Enter the access point password.
- MTU Automatically Configured
Set whether to set the MTU (Max Transfer Unit) automatically. Normally turn it on.
- MTU
If you turn off MTU auto-setting, you can set the MTU manually.
- Band Preset
By selecting the antenna name, the appropriate band will be selected.
Band presets to choose from when using EDGEPLANT T1 as the Terminal System computer:
Band preset (antenna name)
LTE band
W-CDMA band
MA251.A.BI.001
B1, B3, B8, B18, B19, B39, B41
B1, B8, B19
TG.09.0113
B1, B3, B8, B18, B19, B39, B41
B1, B8, B19
TG.30.8113
B1, B3, B8, B18, B19, B21, B39, B41
B1, B8, B19
TG.35.8113
B1, B3, B8, B18, B19, B21, B39, B41
B1, B8, B19
Band presets to choose from when using VTC 1910-S or VTC 1010 as the Terminal System computer:
Band preset (antenna name)
LTE band
TG.09.0113
B1, B3, B8, B18, B19
GSA.8827.A.101111
B1, B3, B8, B18, B19, B21, B41
GA.130.201111
B1, B3, B8, B18, B19, B21, B41
TG.30.8113 (VTC 1910-S only)
B1, B3, B8, B18, B19, B21, B41
Other band presets (W-CDMA not available on VTC 1910-S or VTC 1010):
Band Preset
LTE band
W-CDMA band
docomo
B1, B3, B19, B21
B1, B6, B19
SoftBank
B1, B3, B8
B1, B8, B19
au
B1, B3, B18
Default in Japan
B1, B3
B1
All bands
B1, B3, B5, B7, B8, B18, B19, B21, B38, B39, B40, B41
B1, B5, B6, B8, B19
4.3.6. Setting items for Cellular - USB#
There are no settings specific to this type.